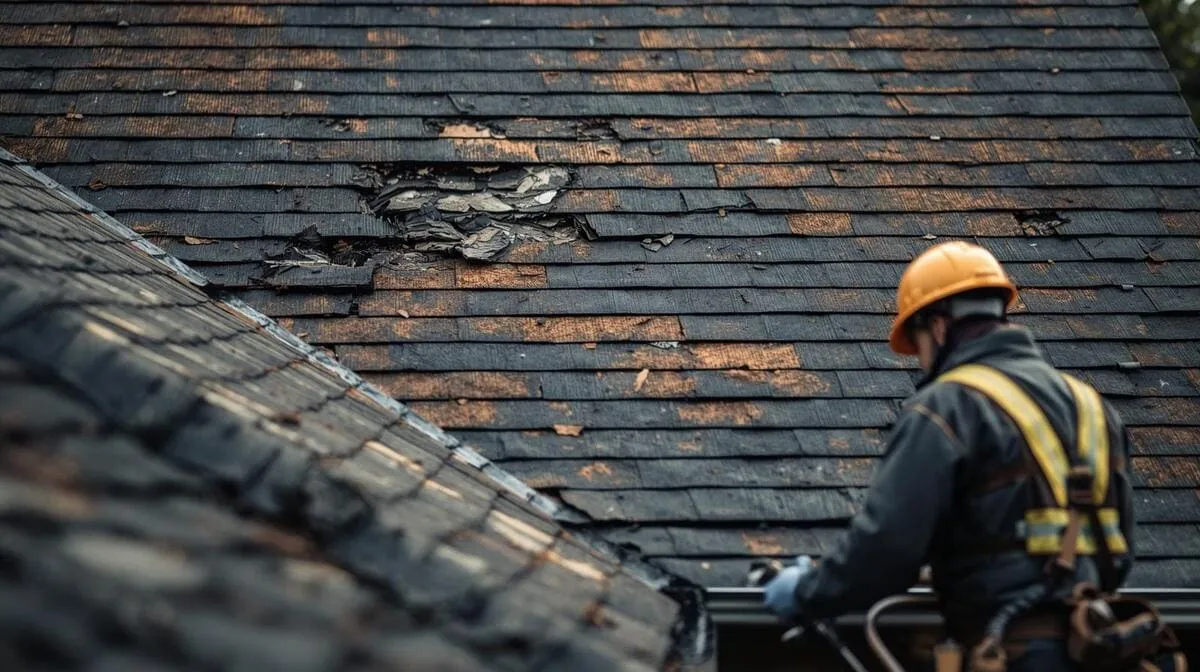

What to Photograph Before Filing a Roof Insurance Claim

These photos can make your roof claim easier.
Roof damage insurance claim documentation is one of those steps that feels optional in the moment and turns out to be decisive later. A claim with thorough photos, clear timestamps, and visible damage in context is a claim that moves quickly, gets approved at the right scope, and rarely needs to be reopened. A claim without that documentation is a claim where every disputed item turns into a phone call, every "we can't tell from the photos" becomes another delay, and every gap in evidence becomes a reason for the adjuster to write down a smaller number.
If a recent storm caused damage to your Grand Rapids home, this guide walks through exactly what to photograph, how to do it well, and what to avoid before the documentation gets cleaned up or thrown away. The goal is to build the visual record once, build it right, and have it ready before you ever pick up the phone.
Why photos matter more than most homeowners realize
Insurance claims for storm-related roof damage are settled on evidence. The adjuster's job is to verify the loss, determine whether it's covered under the policy, and estimate the cost to restore the property. They do this through their own visit, your documentation, and when available, the inspection report from a roofer.
What homeowners often don't realize: the adjuster's visit is brief, sometimes limited by weather, and constrained by what they can safely access. They see the roof at one moment in time, after wind and rain have already moved or hidden some of the evidence. Your photos, taken immediately after the storm, capture conditions the adjuster will never see in person, fresh debris in the yard, hail on the porch, the water bubble on the ceiling before it was drained.
Strong roof insurance claim help is partly about good documentation and partly about timing. The photos taken in the first 24 to 48 hours after the storm are evidence that doesn't exist later.
What to photograph: the full sequence
Work through the categories below in order. Use your phone or a digital camera with the date and timestamp setting on if available; most modern phones embed that automatically.
1. The weather event itself
Before the visible damage, capture the storm context.
Screenshot any severe weather alerts that came through your phone, with the date and time visible. Photograph any hail on the ground, in the gutter, on your porch, on outdoor furniture, or melting on the driveway. Place something next to the hail for scale: a coin, a tape measure, a credit card. Save screenshots of any local news coverage of the storm in your area. If you have a doorbell camera, security camera, or dashcam that recorded the storm, save those clips somewhere safe.
This documentation establishes that a storm event occurred at your address on a specific date. It's the foundation everything else builds on.
2. Wide-angle exterior shots of your home
Before zooming in on specific damage, photograph the home as a whole.
Take photos of each side of the house from a distance; front, back, both sides. Get a clear, in-focus image that shows the roof, gutters, siding, and yard in one frame for each side. These wide shots establish context. They show the adjuster what your home looks like, which slopes face which direction, and what kind of property they're evaluating.
If you have a drone and are comfortable using it safely, an overhead shot is useful but not required. If you don't, the ground-level wide shots are enough.
3. The roof from every visible angle
From the ground, photograph each visible section of the roof.
Walk around the home and get a clear shot of each slope from the closest safe ground position. Use your phone's zoom if needed to capture detail without climbing. Photograph the ridge line, eaves, valleys, and any visible flashing. Look for areas where shingles appear lifted, missing, displaced, or different in color from the surrounding roof.
Do not climb the roof or use a ladder for this. The whole point of the documentation approach is to capture what's visible without putting yourself at risk. A roofer's inspection, included in any free hail damage inspection, gets the close-up roof photos.
4. Gutters, downspouts, and the roof edge
The gutter system is one of the strongest evidence sources for hail and wind damage.
Photograph dented or dimpled gutters from straight on, with good lighting. Get close-up shots of any visible damage with a hand or coin for scale. Photograph downspouts, splash blocks, and the area where downspouts empty, granule buildup in these spots is a key sign of hail damage to the roof above. Photograph any detached, lifted, or sagging gutter sections.
If you can see granules clearly, photograph them with something for scale and in good light. A pile of granules at the base of a downspout is one of the most telling pieces of storm damage documentation a homeowner can provide.
5. Metal items around the property
These are the lookalike-proof witnesses to a hailstorm.
Photograph your AC condenser unit from multiple angles. Hail dents on the fins on one side of the unit are strong evidence that hail came down on that side of the property with real force. Photograph dents on your garage door, mailbox, exterior light fixtures, gas meter housings, and anything else metal on the home or property. If your vehicle was outside during the storm, photograph any hail damage on it. Photograph window screens and storm doors, bent screen frames and dimpled storm doors confirm the storm's intensity.
These items are crucial because they're impossible to confuse with normal wear. A dimpled garage door didn't get that way from age.
6. Siding, windows, and exterior elements
Photograph any visible damage on the siding of your home. Hail can leave small dimples or cracks in vinyl, fiber cement, or wood siding. Photograph window frames, sills, and storm windows for any visible damage. Photograph any broken or cracked glass, even small chips.
If your home has skylights, photograph each one carefully. Skylights take direct hail impact and damage to them is often clearer evidence than the surrounding roof.
7. The yard and surrounding property
Walk the yard and photograph any shingles, shingle pieces, or other roofing material on the ground. Photograph fallen branches, stripped leaves, defoliated trees, and any other debris that confirms the storm's force. Photograph any neighbors' visible damage if it's relevant; for example, a neighbor's tree that fell across a fence or shared property line. Take photos from the perspective of your own property looking outward, not zoomed into the neighbor's home.
8. Interior ceilings, walls, and floors
Move inside and photograph every visible interior sign of damage.
Photograph any ceiling stains, drip marks, or discoloration. Use a wide shot to show the location of the stain in the room, then a close-up of the stain itself. Photograph any water on the floor, on furniture, or on possessions. Photograph wet drywall, sagging ceilings, blistered paint, or any other signs of water intrusion.
If you have an active drip, get a video of it as well. A 10-second video of water actively dripping is more powerful documentation than a still photo of the same scene.
9. The attic
If you can safely access the attic, photograph it thoroughly. This is where roof damage often shows up first, before it reaches the ceiling below.
Photograph any water stains on the underside of the roof decking. Photograph wet, compacted, or discolored insulation. Photograph any daylight visible through the roof in unexpected locations. Photograph water marks on rafters, joists, or framing. Photograph any debris or material that made its way into the attic through openings.
Use the flashlight on your phone to light the attic well, since most attics are too dark for natural photo capture. Do not walk on the insulation itself; stay on rafters or laid plywood walkways.
10. Damaged contents and belongings
If anything inside the home was damaged by water or fallen debris, photograph it. Furniture, electronics, rugs, art, paperwork, clothing, anything personal that took damage as a result of the storm. Photograph the item in place if possible, then individually with any damage visible. These are part of the loss and may be covered under contents coverage even if the primary claim is for the roof.
How to take photos that actually help your claim
The quality of the photos matters. A few simple practices make all the difference.
Use date stamps. Make sure your phone's date and time settings are correct. Most photo apps embed this in the file metadata automatically. If your camera has a visible date stamp setting, turn it on.
Use good lighting. Outdoor photos are easiest during daylight hours, not at dusk or in poor weather. For indoor photos, turn on every light in the room and use your phone's flash if helpful.
Use scale references. Place a coin, ruler, tape measure, or hand next to the damage in close-up shots. This gives the adjuster a clear sense of the size of the damage, which is hard to gauge from photos alone.
Take multiple angles. For each piece of damage, get a wide shot showing its location and a close-up showing the detail. The wide shot answers "where is this?" and the close-up answers "what is it?"
Capture related context. A photo of a dented gutter is good. A photo of a dented gutter alongside the roof slope it sits below is better; it lets the adjuster connect the gutter evidence to the roof.
Take more than you think you need. Photos cost nothing and the extra ones might end up being the key piece of evidence later. Better to have 100 photos and use 30 than to have 30 and wish you'd taken more.
What not to do
A few specific don'ts can save a claim from preventable damage.
Don't throw away damaged materials. Shingle pieces, flashing fragments, screen frames, anything that came off the home should be photographed in place and then set aside, not bagged with the trash. They're physical evidence.
Don't edit, filter, or crop your photos. Use the originals. Edits can be questioned by an adjuster and may compromise the credibility of the documentation.
Don't delete photos that turned out blurry or seemed redundant. Keep everything. Storage is cheap and an extra angle might matter later.
Don't climb the roof to take photos. The free inspection a local roofer provides includes the close-up roof photos. There's no documentation value worth a fall.
Don't post the damage to social media before the claim is filed. Public posts can be referenced by insurers and sometimes complicate claims, especially if the post predates the formal claim by days or weeks.
How to organize the documentation
Once you've taken the photos, organize them in one place. A simple folder on your phone or computer labeled with the storm date and address works fine. If you're sharing with the insurer or roofer, group similar photos together, all exterior, all interior, all attic, all contents, so the reviewer can move through them in logical sequence.
Keep a brief written log of what each set of photos shows. This doesn't need to be formal; a single document with bullet notes is enough.
Request inspection photos and documentation
Above Roofing provides full storm damage inspections that include comprehensive photo documentation as part of the report. We capture the close-up roof photos that homeowners shouldn't take themselves, including shingle-level detail, flashing condition, attic underside imagery, and the full scope of what we observe.
If you're working toward a roof insurance claim in Grand Rapids and want professional inspection photos to pair with your own documentation, request a free inspection. We'll provide the documentation you can use to support your claim, alongside whatever you've already captured from the ground.
For more on the broader claim process, including whether to file in the first place, visit our roof insurance claim article and our Storm and Hail Damage Roof Repair page.
Frequently asked questions
Related articles
Grand Rapids Storm Damage Checklist for Homeowners

Best Roofer for Storm Damage Insurance Claims in Grand Rapids
Wind Damage Roof Repair in Grand Rapids: Signs to Watch For